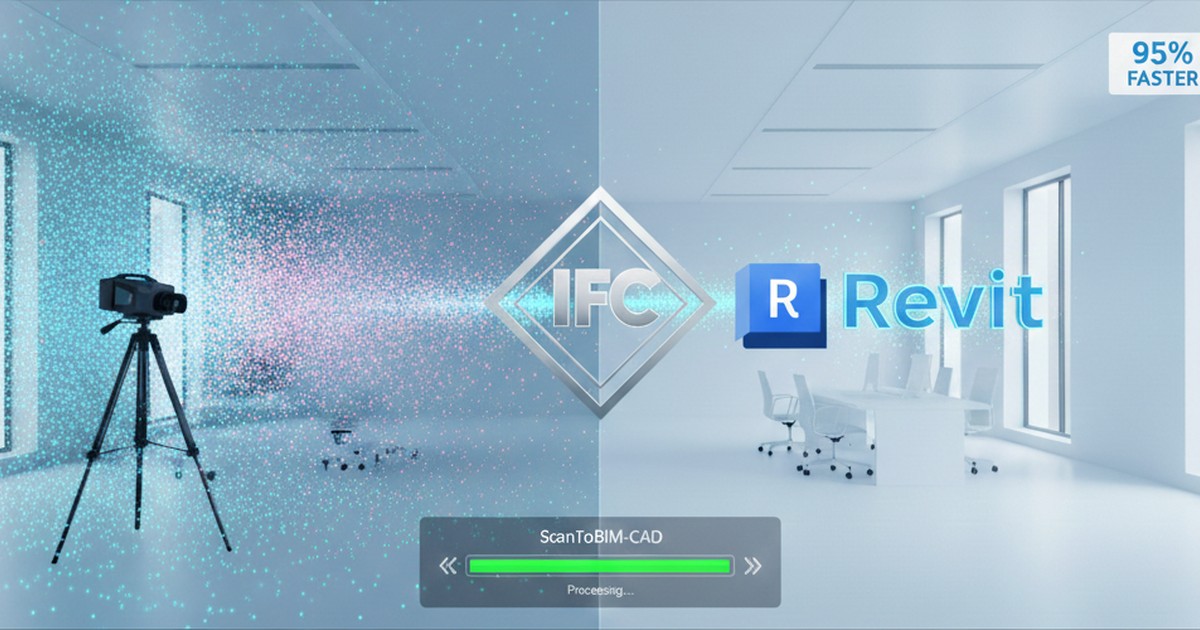
Point Cloud to Revit Model: Automated Conversion, Delivered as IFC/Revit
📋 Quick Summary:
- ✅ The problem: Manual tracing takes 8-40 hours per floor plan ($400-$2,000 cost)
- ✅ The solution: AI automation detects walls, doors, windows automatically (2-3 minutes)
- ✅ Output format: IFC files import directly into Revit as native BIM elements
- ✅ Time savings: 95%+ reduction—from 8-40 hours to 30 minutes total
- ✅ Best for: Interior scans, as-built documentation, eliminating manual tracing
If you're working in Revit and need to bring point cloud data into your BIM model, you've likely encountered the frustrating reality: Revit doesn't directly import E57, LAS, or PLY point cloud files. The traditional workflow requires importing point clouds through Autodesk ReCap, then manually tracing over the point cloud for hours—or even days—to create walls, doors, windows, and other building elements.
But there's a better way: automated element detection. Instead of spending 8-40 hours manually tracing every wall, door, and window, AI-powered tools can automatically detect these elements from your point cloud and generate a complete BIM model in minutes. The output is delivered as an IFC file, which Revit can import directly and convert to native Revit elements with a single mapping operation.
In this comprehensive guide, we'll walk through both the traditional manual tracing workflow and the modern automated approach, showing you how to eliminate hours of tedious work and get from point cloud to Revit BIM model in under an hour.
Why Convert Point Clouds to Revit?
Revit is the industry standard for Building Information Modeling (BIM), used by architects, engineers, and construction professionals worldwide—including AEC firms in the US. Converting point clouds to Revit enables you to:
- Create accurate as-built models from laser scan data
- Model renovations based on existing building conditions
- Generate floor plans, sections, and elevations directly in Revit
- Collaborate with team members using standard BIM workflows
- Export to other formats (DWG, DXF, PDF) from a single source of truth
The challenge is getting your point cloud data into Revit in a usable format. Let's explore the two main approaches.
Method 1: Traditional Workflow (Manual Tracing in Revit)
The traditional method involves importing your point cloud into Revit and then manually tracing every single building element. This workflow has been the standard for years, but it's extremely time-consuming and expensive.
Step 1: Convert Point Cloud to ReCap Format
First, you need Autodesk ReCap Pro (or ReCap Photo for photogrammetry). ReCap is Autodesk's point cloud processing software that converts various formats into RCP (ReCap Project) files.
Your original scan formats:
- E57 - From terrestrial scanners (Faro, Leica, Trimble)
- LAS/LAZ - From LiDAR scanners and mobile mappers
- PLY - From Matterport or photogrammetry
- FLS - Native Faro format (requires Faro Scene first)
In ReCap Pro, you'll:
- Import your point cloud file (E57, LAS, PLY, etc.)
- Register multiple scans if you have multiple scan positions
- Clean up the point cloud (remove noise, unwanted objects)
- Export as RCP (ReCap Project) or RCS (ReCap Scan) format
⚠️ ReCap Limitations:
- Time-consuming: Registration and cleanup can take 2-4 hours for a single project
- File size: RCP files can be very large (hundreds of MB to GB)
- Point cloud only: RCP files are point clouds, not BIM elements—you still need to model manually
- Revit performance: Large point clouds can slow down Revit significantly
- Proprietary format: RCP only works with Autodesk software
Step 2: Import RCP into Revit
Once you have your RCP file, you can import it into Revit:
- Open your Revit project
- Go to Insert tab → Point Cloud
- Click Insert Point Cloud
- Select your RCP file
- Position and scale the point cloud in your model
At this point, you have a point cloud visible in Revit, but it's still just a point cloud—not actual Revit elements. You'll need to manually trace over the point cloud to create walls, floors, doors, and windows.
Step 3: The Manual Tracing Nightmare
With the point cloud imported, you now face the most time-consuming step: manually tracing every single building element over the point cloud:
- Trace every wall, one by one, following the point cloud
- Manually place each door and window
- Create floor elements by tracing boundaries
- Model structural elements (columns, beams) individually
- Add annotations and dimensions manually
This manual tracing process typically takes 8-40 hours per floor plan, depending on the complexity of the space. For a multi-story building, you're looking at weeks of tedious, repetitive work.
⚠️ The Real Cost of Manual Tracing:
- Time investment: 8-40 hours per floor plan
- Cost: $400-$2,000 per floor plan at $50/hour
- Multi-story building: $2,000-$10,000+ for a 5-story building
- Error-prone: Human fatigue leads to mistakes and rework
- Opportunity cost: Your team could be doing higher-value work instead
Method 2: Automated Workflow (AI Detection → IFC → Revit)
The modern approach eliminates manual tracing entirely. Instead of spending days tracing over point clouds, AI-powered tools automatically detect walls, doors, windows, and other building elements from your point cloud and generate a complete BIM model in minutes.
How Automated Element Detection Works
ScanToBIM-CAD uses AI to automatically analyze your point cloud and detect building elements:
- Upload your point cloud (E57, LAS, PLY, or other formats)
- AI analyzes the point cloud - The system automatically identifies walls, doors, windows, and other structural elements
- Generate BIM model - A complete 3D model is created with all detected elements
- Export as IFC - The model is exported in IFC format, ready for Revit import
The entire automated process takes 2-3 minutes for a typical interior scan. No manual tracing. No hours of repetitive work. Just upload, wait, and download your complete BIM model.
🚀 The Automation Advantage:
- Time savings: 8-40 hours → 2-3 minutes (95%+ reduction)
- Cost savings: $400-$2,000 → $3-$29 per floor plan
- Consistency: AI detection is uniform, no human fatigue errors
- Speed: Process multiple floors in the time it takes to manually trace one
- Scalability: Handle large projects without proportional time increase
Why IFC Format? (The Delivery Mechanism)
Once the AI has detected all the building elements, we need a format that Revit can import. That's where IFC (Industry Foundation Classes) comes in—it's the open standard format that enables seamless import into Revit and other BIM software.
IFC is an international standard (ISO 16739) for BIM data exchange. Unlike proprietary formats, IFC works with virtually all BIM software:
- Autodesk Revit - Full IFC import/export support
- Graphisoft ArchiCAD - Native IFC support
- Vectorworks - IFC import/export
- Bentley MicroStation - IFC support
Most importantly, IFC files contain actual BIM elements (walls, doors, windows, spaces) with their properties—not just point cloud data. This means when you import an IFC file into Revit, you get real, editable BIM elements that you can immediately use in your workflow.
💡 Key Point: The value isn't in the IFC format itself—it's in the automation that creates the BIM model. IFC is simply the delivery mechanism that gets your automatically-detected elements into Revit.
Step-by-Step: From Automated Detection to Revit
Once you have your IFC file from ScanToBIM-CAD (with all elements automatically detected), getting it into Revit is a simple two-step process:
Step 1: Import IFC into Revit
In Revit, importing your automatically-generated IFC file is straightforward:
- Go to Insert tab → Import IFC
- Browse to your IFC file (downloaded from ScanToBIM-CAD)
- Click Open
- Revit will process the IFC file and import all the automatically-detected elements
Step 2: Convert to Native Revit Elements (One Simple Operation)
Here's where the magic happens: Revit automatically maps the IFC elements to native Revit families. This is a single operation—no manual work required:
- IFC walls → Native Revit walls (editable, schedulable)
- IFC doors → Native Revit door families (can swap types, edit properties)
- IFC windows → Native Revit window families (fully editable)
That's it. The elements that took 8-40 hours to manually trace are now in your Revit model as native, editable elements—ready to use in your BIM workflow.

✨ The Complete Workflow:
- Upload point cloud to ScanToBIM-CAD (30 seconds)
- AI automatically detects all elements (2-3 minutes)
- Download IFC file (10 seconds)
- Import IFC into Revit (1-2 minutes)
- Revit automatically maps to native elements (automatic)
- Review and refine (20-30 minutes)
Total time: 30-35 minutes vs 8-40 hours of manual tracing
Step 3: Review and Refine (Optional)
After import, you may want to make minor adjustments:
- Swap door/window types - Replace generic families with your project's standard families
- Adjust wall types - Change to match your project standards
- Verify dimensions - Spot-check critical measurements
- Add missing elements - Manually add any furniture or fixtures that weren't detected
This refinement process typically takes 20-30 minutes, compared to 8-40 hours for manual tracing. The bulk of the work—detecting and modeling all the structural elements—is already done automatically.
With the IFC elements imported, you can now:
- Edit wall properties - Change wall types, materials, thickness
- Adjust door/window types - Swap to your project's standard families
- Add missing elements - Model any elements that weren't detected (furniture, fixtures, etc.)
- Add annotations - Dimensions, room tags, door/window tags
- Create views - Floor plans, sections, elevations, 3D views
This cleanup process typically takes 30 minutes to 2 hours, compared to 8-40 hours for manual tracing from a point cloud.
Comparison: Manual Tracing vs Automated Detection
Let's compare the two approaches side-by-side. The key difference isn't the format—it's whether you manually trace elements or let AI detect them automatically:
| Aspect | Traditional (Manual Tracing) | Automated (AI Detection) |
|---|---|---|
| Element Detection | Manual tracing (human does all work) | AI automatically detects walls, doors, windows |
| Processing Time | 8-40 hours of manual tracing | 2-3 minutes (automated detection) |
| Total Time (including cleanup) | 10-44 hours | 30-35 minutes |
| Cost (at $50/hr) | $500 - $2,200 per floor plan | $3 - $29 per floor plan |
| Human Effort | 100% manual (trace every element) | Minimal (review and refine only) |
| Output Format | RCP (point cloud - still need to trace) | IFC (complete BIM model with elements) |
| Revit Elements | None (must trace manually in Revit) | All elements detected and ready to import |
| Revit Import | Import point cloud, then trace over it | Import IFC, auto-map to native elements (one operation) |
| Error Rate | High (human fatigue, inconsistencies) | Low (consistent AI detection) |
| Scalability | Linear (5 floors = 5x the time) | Efficient (process multiple floors quickly) |
💡 The Bottom Line:
Automation eliminates 95%+ of the manual work. Instead of spending days tracing, you spend minutes reviewing. IFC is just the format that delivers your automatically-detected elements into Revit—where they become native Revit elements with a single mapping operation.
Best Practices for Point Cloud to Revit Workflows
Whether you choose the traditional or modern workflow, here are some best practices to ensure success:
1. Start with Quality Scans
The quality of your output depends on the quality of your input. Ensure your point cloud:
- Has good coverage (no major gaps)
- Is properly registered (multiple scans aligned correctly)
- Has appropriate resolution (not too sparse, not unnecessarily dense)
- Includes color data if possible (helps with element detection)
For more information on scan quality, see our guide on as-built floor plans from laser scans.
2. Choose the Right Format
For IFC workflows, E57 format typically works best as it preserves color and metadata. For more on point cloud formats, see our comparison of E57 vs LAS vs PLY formats.
3. Verify Units and Coordinates
Before importing into Revit, ensure your IFC file uses the correct units (feet or meters) and coordinate system. Mismatched units will result in incorrectly scaled models.
4. Review Before Finalizing
Always review the imported model carefully:
- Check dimensions against known measurements
- Verify wall locations and thicknesses
- Confirm door and window placement
- Look for any missing or incorrectly detected elements
5. Use Standard Revit Families
After import, consider swapping generic IFC elements for your project's standard Revit families. This ensures consistency with your BIM standards and improves model quality.
Common Issues and Solutions
Here are some common issues you might encounter when importing IFC files into Revit, and how to solve them:
Issue 1: Elements Not Importing Correctly
Problem: Some walls, doors, or windows don't appear in Revit after import.
Solution: Check the IFC import settings in Revit. Go to Manage → IFC Options and adjust the import mapping. You may need to manually map certain IFC types to Revit families.
Issue 2: Incorrect Scale or Units
Problem: The imported model is too large or too small.
Solution: Verify the units in your IFC file match your Revit project units. You can check IFC units using a text editor (IFC files are text-based) or an IFC viewer like IfcOpenShell.
Issue 3: Missing Elements
Problem: Some building elements (furniture, fixtures, etc.) are missing from the imported model.
Solution: Automated tools like ScanToBIM-CAD focus on structural elements (walls, doors, windows). Furniture and fixtures may need to be added manually in Revit, or you can use the point cloud as a reference for placement.
Issue 4: Performance Issues
Problem: Revit runs slowly after importing a large IFC file.
Solution: IFC files are typically much smaller than point cloud files, but if you experience performance issues, try:
- Breaking the model into separate files by floor or area
- Using worksets to control visibility
- Simplifying complex geometry if needed
When to Use Each Workflow
Both workflows have their place. Here's when to use each:
Use Traditional (ReCap) When:
- • You need the full point cloud visible in Revit
- • You're doing detailed as-built documentation
- • You need to measure exact distances from point cloud
- • You're working with exterior scans or complex geometry
- • You already have ReCap Pro in your workflow
Use Modern (IFC) When:
- • You need BIM elements, not just point cloud references
- • You're working with interior scans (our specialty)
- • You want faster processing and smaller file sizes
- • You need interoperability with multiple BIM software
- • You want to save time and reduce costs
Conclusion: Eliminate Manual Tracing with Automation
The traditional manual tracing workflow has been the industry standard for years, but it's time-consuming, expensive, and error-prone. The modern automated approach eliminates 95%+ of this manual work by using AI to detect building elements automatically.
Here's what automation gives you:
- Time savings: 8-40 hours → 30-35 minutes (95%+ reduction)
- Cost savings: $400-$2,000 → $3-$29 per floor plan
- Consistency: Uniform detection without human fatigue errors
- Speed: Process multiple floors in the time it takes to manually trace one
- Native Revit elements: Import IFC and map to native Revit families in one operation
The value isn't in the IFC format itself—it's in the automation that eliminates manual tracing. IFC is simply the delivery mechanism that gets your automatically-detected elements into Revit, where they become native, editable Revit elements.
If you're ready to eliminate hours of manual tracing, ScanToBIM-CAD can automatically detect all building elements from your point cloud in just 2-3 minutes. Upload your E57, LAS, or PLY file, and download a complete IFC model ready to import into Revit.
🚀 Ready to Convert Your Point Cloud to Revit?
Try ScanToBIM-CAD free and see how fast you can get from point cloud to Revit BIM model. No credit card required.
Try ScanToBIM-CAD Free →Related Resources
- How to Convert Point Cloud to Floor Plan [2026 Guide] - Comprehensive guide covering manual and automated workflows
- As-Built Floor Plans from Laser Scans: Complete Workflow - Learn about as-built documentation workflows
- Faro Scanner to Floor Plan: Automated Workflow - Scanner-specific guide for Faro users
- IFC Specification (buildingSMART) - Official IFC format documentation
- Autodesk Revit IFC Import Documentation - Official Revit IFC import guide
Ready to Convert Your Point Cloud?
Try ScanToBIM-CAD free and convert your first point cloud to a floor plan in minutes. No credit card required.
Start Free TrialRelated Posts
![How to Convert Point Cloud to Floor Plan [2026 Guide]](/_next/image?url=%2Fblog%2Fpoint-cloud-to-floor-plan%2Ffeatured.jpg&w=3840&q=75)
How to Convert Point Cloud to Floor Plan [2026 Guide]
Stop wasting 8+ hours manually tracing point clouds. Learn how to convert point clouds to floor plans in minutes using AI-powered automation. Compare manual vs automated methods and see real time and cost savings.

As-Built Floor Plans from Laser Scans: Complete Workflow
Create accurate as-built floor plans from laser scans in hours instead of weeks. Learn the complete workflow from field scanning to final CAD drawings, compare traditional vs modern AI-assisted methods, and see real cost savings.

Faro Scanner to Floor Plan: Automated Workflow
Learn how to convert Faro scanner point clouds to accurate floor plans. Step-by-step guide covering Faro Scene export, format conversion, and automated CAD generation. Compare manual tracing vs automated workflows for time and cost savings.